A look back at 2016
Posted: January 2, 2017 Filed under: Airfix Battles, COW (Conference of Wargamers), Cruising, Mini-campaign, Modelling, The Portable Wargame 10 CommentsJanuary and February seem to have been dominated by my WINTER-ISH WAR mini-campaign, whilst March saw the beginning of my model pre-dreadnought shipbuilding programme and the acquisition of Stuart Asquith’s collection of Del Prado painted 25/28mm Napoleonic figures. In April I seemed to be a bit all over the place until the very end of the month, when AIRFIX BATTLES: THE INTRODUCTORY WARGAME was published. The latter got a bit of play during the following month and I spent quite some time reading through ZONES OF CONTROL: PERSPECTIVES ON WARGAMING. June saw the end of my massive shipbuilding programme as well as extensive reports on the models that I saw in the Monaco Naval Museum.
July is always a busy month, and began with COW2016. It also saw the first glimmerings of my renewed interest in my ongoing Napoleonic project, and by the end of August my Dutch-Belgians, Brunswickers, and Hannoverians were all renovated and based. Connections UK 2016 took place in September, and work on my Napoleonic project continued apace, with the result that my British Napoleonic Army was finished by the middle of October. I then began work on my un-renovated French figures, and by the time Sue and I went on our latest cruise (which took up the last week of November and the first three weeks of December), the bulk of the French Infantry were well on the way to completion.
So where did my PORTABLE WARGAME book fit into all this? Well it has been gradually coming together over the months, and as I write this, it is approaching the stage where it is almost ready to be proof-read before publication. With luck it will be published early in 2017, and then I can begin work on my next book … which will be the centenary history of an important Masonic Lodge.
Miniature Wargames with Battlegames Issue 399
Posted: July 5, 2016 Filed under: Airfix Battles, Wargames publications Leave a comment
The articles included in this issue are:
- Briefing (i.e. the editorial) by Henry Hyde
- World Wide Wargaming by Henry Hyde
- Forward observer by Mike Hobbs
- Caned palms: The continuing tales of a wargames widow by Diane Sutherland
- Fantasy Facts by John Treadaway
- Down by the sea: Fighting the Great Patriotic War one battle as a time: Part Three by Andrew Rolph
- The perfect period: A magnificent wargaming spectacles by Paul Robinson
- Express delivery: Get there the fustest with the mostest supplies by Chris Birch
- Demonstrate THIS: Do wargames shows need demo games? by Nick Hughes
- Grenouisse at bay part 1: The Wars of the Faltenian Succession return by Henry Hyde
- Hex encounter by Brad Harmer-Barnes
- Send three and fourpence by Conrad Kinch
- Partizan 2016 by Mike Whitaker
- RAGE 2016 by Neil Shuck
- Recce
- The Battlegames Combat Stress Appeal report by Henry Hyde
In his editorial, Henry Hyde announced that whilst he is remaining editor, he is handing over the layout of Miniature Wargames with Battlegames to a team that work for the publishers. The magazine has a distinctive style to it, and one hopes that the new team will retain it once they take over.
As to the contents … well Andrew Rolph’s continuing series on wargaming the Great Patriotic War is a ‘must read’ for me, as is Conrad Kinch’s regular column. Nick Hughes makes some very interesting comments about the place of demo games at wargames shows, and I hope to try out the AIRFIX BATTLES scenario by Chris Birch as soon as I have enough time to do so.
Airfix Battles on hexes?
Posted: May 24, 2016 Filed under: Airfix Battles 4 CommentsThe only major change I can foresee with regard to the existing movement rules related to turning vehicles. My current thinking (which appears to be in line with that of Ross Macfarlane, who is working along similar lines) is that vehicles should be able to turn 60° without suffering a penalty, a 120° turn at a ‘cost’ of one hex of movement, and a 180° turn at a ‘cost’ of two hexes of movement.
As most of my figures are mounted on multi-figure unit bases I am thinking of using two such bases for each standard AIRFIX BATTLES infantry unit, with magnetic numbered tiles on each base to show its current strength.
This is about as far as my thinking has so far progressed … and until I can play-test my ideas in a battle or two involving three or four units per side, I cannot go any further developing my ideas.
Airfix Battles: Mea culpa
Posted: May 12, 2016 Filed under: Airfix Battles 14 CommentsThe section of the rules that I ‘forgot’ reads as follows:
‘Shooting at Armoured Vehicles follows the same steps as shooting at Infantry Units, except that the effect of hits is different. Armoured Vehicles can only be shot by Anti-Tank (AT) weapons. On your Unit cards these are denoted as AT(X) where X is the number of dice you roll to hit the Armoured Vehicle using your dice. Armoured Vehicles may be hit, but can function as normal with no damage, or with partial damage, owing top their armour.
A Vehicle’s initial Hit Dice is shown on its card as an Armour rating, When you deploy the Armoured Vehicle, place a dice next to the Vehicle with its value showing – this is the Vehicle’s Hit Dice. Keep the Hit Dice with the Vehicle as it moves.
For each hit the Armoured Vehicle takes, the attacker must make a Penetration Roll. This roll must be equal to or greater than the number showing on the Hit Dice of the target Vehicle to damage it. For each Penetration scored, decrease the Hit Dice by 1. When the Hit Dice reaches 0), the Vehicle is destroyed.‘
The Tiger Tank has AT(4) and Armour 5+ and the Sherman M4A2 Tank has AT(3) and Armour 4+. When the Tiger fires at the Sherman M4A2 Tank, it throws four D6 dice and hits on a 4 or more, whereas when the Sherman M4A2 Tank fires at the Tiger Tank it throws three D6 dice and hits on a 5 or more.
Tiger Tank vs. Sherman M4A2 Tank (Round 1)
The Tiger throws 4 D6 dice and scores 1, 2, 4, and 6, therefore hitting the Sherman M4A2 twice. Two Penetration Rolls are made, and the scores of 3 and 4 mean that the Sherman M4A2 Tank’s Hit Dice is turned from 4 to 3.
Sherman M4A2 Tank vs. Tiger Tank (Round 1)
The Sherman M4A2 throws 3 D6 dice and scores 2, 3, and 5, therefore hitting the Tiger Tank once. One Penetration Roll is made, and the score of 1 means that the Tiger Tank Hit Dice remains as it is, showing a 5.
Tiger Tank vs. Sherman M4A2 Tank (Round 2)
The Tiger throws 4 D6 dice and scores 3, 3, 4, and 4, therefore hitting the Sherman M4A2 twice. Two Penetration Rolls are made, and the scores of 5 and 5 mean that the Sherman M4A2 Tank’s Hit Dice is turned from 3 to 1.
Sherman M4A2 Tank vs. Tiger Tank (Round 2)
The Sherman M4A2 throws 3 D6 dice and scores 1, 3, and 5, therefore hitting the Tiger Tank once. One Penetration Roll is made, and the score of 3 means that the Tiger Tank Hit Dice remains as it is, showing a 5.
Tiger Tank vs. Sherman M4A2 Tank (Round 3)
The Tiger throws 4 D6 dice and scores 3, 4, 6, and 6, therefore hitting the Sherman M4A2 thrice. Three Penetration Rolls are made, and the scores of 1, 2, and 3 mean that the Sherman M4A2 Tank is destroyed.
Something else that I got wrong was making Armoured Vehicle Units take Morale Checks when they were hit … although I think that the results I generated made sense in the context of the play-test.
Airfix Battles: My second play-test
Posted: May 11, 2016 Filed under: Airfix Battles, Battle Report, Early 20th Century 20 Comments
In this scenario the American forces had:
- 1 x Sherman M4A2 Tank + 1 Lieutenant
- 2 x Sherman M4A2 Tanks
- 1 Infantry Squad + 1 Lieutenant
- 1 Infantry Squad

The Germans forces included:
- 1 x Panzer IV Tank + 1 Lieutenant
- 1 x Tiger Tank
- 1 Grenadier Squad + 1 Lieutenant
- 1 Grenadier Squad

Starting Positions
Each side deployed in their respective Deployment Zones.

Turn 1
As both sides have two officers, one of whom can expend two Command Cards, both sides are dealt three Command Cards.
The Germans threw the highest D6 die score and moved first. They were dealt the following Command Cards:
- ‘Either 1 Infantry Unit that is Dug In may Fire with 1 extra D6 OR 1 Artillery Unit may Fire with 1 extra AT D6.’
- ‘2 Vehicle Units may Move once each and then Fire once each.’
- ‘1 Unit may Fire during an enemy Move. This Fire must target the enemy Unit that Moved.’ (Interrupt Command Card)
As the Germans have no Units that meet the criteria of the first of their Command Cards, that was discarded.
Both the Tank Units moved …

… and then fired.


As a result, the leading Sherman M4A2 Tank (+ 1 Lieutenant) Unit was hit and had its armour penetrated twice. Despite this, the Unit passed its Morale Check.
The Americans were dealt the following Command Cards:
- ‘1 Vehicle Unit may Move once, and then 1 Infantry Unit may Move once then Fire once OR 1 Infantry Unit may Move then Fire with 1 extra AT dice for each AT weapon it carries.’
- ‘2 Vehicle Units may Move once each and then Fire once each.’
- ‘Either an Infantry Unit regains up to 2 men OR A Vehicle Unit regains 1 Hit Dice.’ (Interrupt Command Card)
The Americans immediately used the Interrupt Command Card to restore part of the damage already suffered by the Sherman M4A2 Tank, and then moved that Tank Unit and one of the others forward.

They then opened fire on the nearest German Tank Units … and inflicted damage on both! (Neither German Tank Unit failed their Morale Test.)


At this point the Germans played their Interrupt Command Card, and the Tiger Tank Unit fired at the Sherman M4A2 Tank (+ 1 Lieutenant) Unit, and damaged it yet again. Although damaged, the Unit still manage to pass its Morale Check.

The Americans then moved their remaining Tank Unit and left-hand Infantry Unit forward. The latter then fired at the German Panzer IV Tank Unit, but did it no damage.

Turn 2
For a second time the Germans threw the highest D6 die score and moved first. They were dealt the following Command Cards:
- ‘1 Infantry Unit may Move using 3 times its normal move. If the Unit is targeted by Interrupt Fire or Stay Frosty, it does not receive a Save OR Move 1 Vehicle with +2 and 1 free 90 degree turn.’
- ‘Either 2 Infantry Units may Fire then Move with +1 OR 2 Vehicle Units may Fire then Move.’
- ‘Play on a pinned or retreating Unit after resolving any set of Morale Checks for that Unit. Automatically rally the Unit to A-OK.’ (Interrupt Command Card)
The Germans decided to fire with both their Tank Units and then to move them.
The Tiger Tank Unit fell back slightly after having fired at the Sherman M4A2 Tank (+ 1 Lieutenant) Unit …

… which it hit, damaged, and pinned.

The Panzer IV Tank Unit moved forward and turned to engage the left-hand Sherman M4A2 Tank Unit …

… which it also hit and damaged. (The American Tank Unit did not fail its subsequent Morale Check.)

The Germans then moved one of their Grenadier Units forward to support the Tank Units.

(At this point I realised that in error I had moved the German Tank Units and then fired rather than ‘Fire then Move’ as the Command Card stipulated. I decided to leave matters as they were, but to try to pay better attention to what was printed on the Command Cards in future!)
The Americans were dealt the following Command Cards:
- ‘2 Infantry Units may Fire then Move with +1 OR 2 Vehicle Units may Fire then Move.’
- ‘2 Vehicle Units may Fire once each.’
- ‘1 Unit may Move during an enemy Move. The Unit may not declare an Assault.’ (Interrupt Command Card)
The Americans chose to fire with their their left-hand and central Sherman M4A2 Tank Units at the German Panzer IV Tank Unit …

… but neither managed to damage the German Tank Unit.
The Americans then chose to ‘Fire and Move’ with the central and right-hand M4A2 Tank Units at the German Tiger Tank Unit …

… which they both hit. As a result of failing its Morale Check, the Tiger Tank Unit became pinned.

The central and right-hand M4A2 Tank Units then moved forward in order to threaten the very exposed German Grenadier Unit … and in order to occupy the Objective.

As the Interrupt Command Card was unusable, the turn ended.
Turn 3
The Americans threw the highest D6 die score and moved first. They were dealt the following Command Cards:
- ‘2 Vehicle Units may Fire once each.’
- ‘1 Unit may Move with +2, and then Fire Once.’
- ‘1 Unit may Move during an enemy Move, but must end its Move further away from the Unit’s nearest enemy. The Unit may not declare an Assault.’
The central and right-hand M4A2 Tank Units both fired at the Tiger Tank Unit …

… which they hit and destroyed!

The left-hand American Infantry Unit moved forward, and fired at the German Grenadier Unit immediately in front of it.
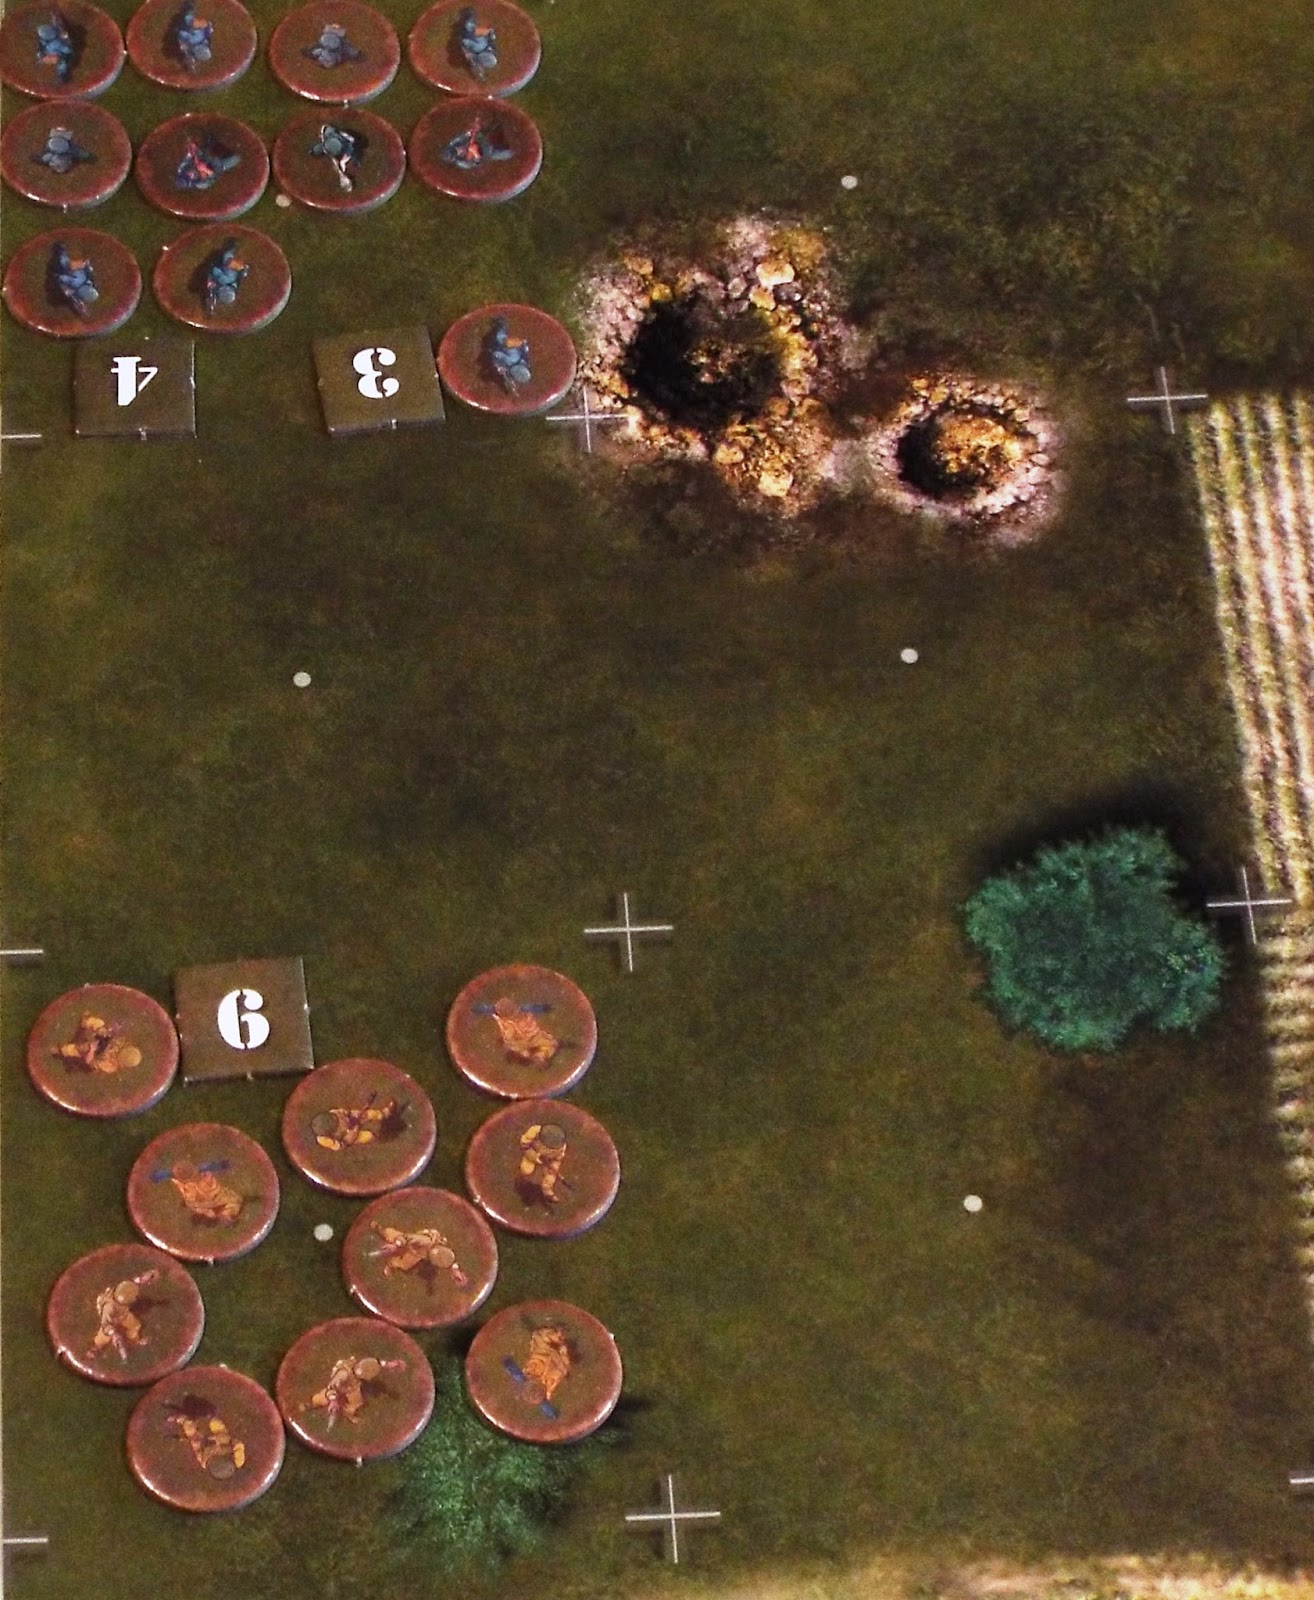
They inflicted 4 casualties, and the German Units became pinned when it failed its Morale Check.

The Germans were dealt the following Command Cards:
- ‘2 Vehicles may Fire once each.’
- ‘1 Infantry Unit that is Dug In or in cover may Fire with 1 extra D6 OR 1 AT Unit may Fire with 1 extra AT dice.’
- ‘Either 1 Infantry Unit with Rifles may Move then Fire using Rifles. Re-roll once for each miss when firing at a target within 2 squares OR 1 vehicle Unit may Move once and Fire all its weapons once each.’
The German Panzer IV Tank Unit fired at the central M4A2 Tank Unit …

… which it hit and pinned. (The M4A2 Tank Unit failed its Morale Check.)

The unpinned German Grenadier Unit moved into the rough terrain to its right, and fired at the nearby American Infantry Unit …

… on which it inflicted 6 casualties, causing it to be pinned when it failed its Morale Check.

As the remaining Command Card was unusable, the turn ended.
Turn 4
The Germans threw the highest D6 die score and moved first. They were dealt the following Command Cards:
- ‘1 Infantry Unit may Move using 3 times its normal move. If the Unit is targeted by Interrupt Fire or Stay Frosty, it does not receive a Save OR Move 1 Vehicle with +2 and 1 free 90 degree turn.’
- ‘1 Infantry Unit may Fire once then Move with +2. Rough Terrain cost 1 to enter OR 1 Vehicle Unit may Move and Assault. It gains +1 to Morale Checks during this Order.’
- ‘Either an Infantry Unit regains up to 2 men OR A Vehicle Unit regains 1 Hit Dice.’ (Interrupt Command Card)
Knowing that they were losing the battle, but wanting to ensure that they were able to withdraw to fight another day, the Panzer IV Tank Unit turned and moved away from the American Tanks.

The unpinned German Grenadier Unit fired at the nearby American Infantry Unit …

… and wiped it out.

They then withdrew towards their Deployment Zone.

The Americans were then dealt the following Combat Cards:
- ‘1 Infantry Unit may Move using 3 times its normal move. If the Unit is targeted by Interrupt Fire or Stay Frosty, it does not receive a Save OR Move 1 Vehicle with +2 and 1 free 90 degree turn.’
- ‘1 Unit may Move with +2 and then Fire once.’
- ‘1 Unit may Fire during an enemy Move. This Fire must target the enemy Unit that Moved.’ (Interrupt Command Card)
The remaining unpinned M4A2 Tank Unit fired at the withdrawing German Panzer IV Tank Unit … and missed!

At this point the Americans decided not to use any more of their Command Cards, and the turn – and the battle – ended.
The result was a resounding victory for the Americans, who had not only occupied the Objective but also destroyed a Tiger Tank Unit is the process. On the other hand, the Germans had managed to destroy an American Infantry Unit.
Comments
- The addition of armoured vehicles adds another dimension to the game, and I found it even more enjoyable that my first play-test.
- Once Units get pinned, you have a devil of a job getting them going again.
- The Interrupt Command Cards are very useful, but in a solo game only by the side that goes first can use them. I suspect that this is not a problem in a normal face-to-face battle.
- I have found these rules simple to learn and use, but the results they produce are quite subtle and not predictable.
Airfix Battles: The Force Card Reinforcement Pack arrives!
Posted: May 8, 2016 Filed under: Airfix Battles, Early 20th Century 6 Comments- Axis:
- 2 x Panther Tank
- 1 x Tiger Tank + Michael Wittmann
- 1 x StuG IIIG Assault Gun
- 1 x Tiger II (King Tiger) Tank
- 1 x Sdfkz 222 Armoured Car
- Allies (American):
- 1 x Sherman Calliope Tank
- 1 x M8 greyhound Armoured Car
- 1 x M10 Tank Hunter
- 1 x Bazooka Team
- 1 x Engineers
- Allies (British):
- 1 x Sherman Firefly Tank + Captain
- 1 x Cromwell IV Tank
- 1 x Churchill VII Tank
- 1 x Churchill Crocodile Tank
- 1 x Bren Carrier
- 1 x Captain
- 1 x Lieutenant
- 1 x Commando Sergeant
- 1 x Veterans
- 1 x Commandos
- 2 x Tommies
- 1 x 6pdr AT Gun
These additions to the range of Force Cards certainly offer some interesting opportunities for future scenarios/missions.
Airfix Battles: The first play-test
Posted: May 6, 2016 Filed under: Airfix Battles, Battle Report, Early 20th Century 20 Comments
Both sides comprised two squads of Infantry, some Veterans, and a Captain.

In order to get a better feel for how the game works, I used the solo play option for both sides, using D6 scores to determine which side moved first each turn. (After Turn 2 (see below) I also removed any exclusively Vehicle-related Command Cards from the pack that I used as I thought that including them might slow the game down.) I’m not sure if this was what the designers originally intended, but it enabled me to conduct the play-test as an interested observer, not as a participant.
Starting Positions
Each side deployed in their respective Deployment Zones.

Turn 1
Both sides drew a ‘2 Units may Fire then Move with +1’ Command Card, with the Germans moving first.

The Americans then moved.

Turn 2
The Germans drew a ‘1 Unit may Move with +2 and then Fire once’ Command Card and the Americans drew a ‘2 Vehicle Units may Move once each, and then Fire once each’ Command Card.
As the Germans were the only side with a card that could be used, they chose to move their Veterans and to fire at one of the American Units …

… with quite devastating results. (They caused 3 casualties and the American Unit had to take a Morale Check, which it failed. As a result it was now Pinned.)

Turn 3
The Americans drew a ‘1 Infantry Unit may Move 3 times its normal move’ Command Card and the Germans drew a ‘1 Infantry Unit may Fire once then Move +2’ Command Card.
The unpinned American Infantry Unit charged forward and assaulted the German Infantry Unit occupying a farm.

They were met by defensive fire, which depleted their numbers by 3.

Their assault went in, with the result that the German also lost 3 men.

The Germans then counter-assaulted, and inflicted another 2 casualties on the Americans.

Both sides then undertook a Morale Check … with the result that the German Infantry Unit became Pinned but the Americans were not!
The German Veterans now fired at the already pinned American Infantry Unit …

… and inflicted 3 more casualties on it.

The Veterans then withdrew to support their own pinned Infantry Unit.

The pinned American Unit took a further Morale Check … which it failed. As a result, the Unit withdrew towards its side’s Deployment Zone.
Turn 4
With things seemingly not going very well for the Americans, which side went first this turn was very important. The Germans threw the better D6 die score and went first
The Germans drew a ‘1 Unit may Fire with +1 on each Die Roll when rolling to hit’ Command Card and the Americans drew a ‘1 Infantry Unit with Rifles may Move then Fire using the Rifles. Re-roll once for each miss when firing at a target within 2 squares’ Command Card.
As the Germans had no Units that qualified to use their Command Card (the only Unit that might have been able to use it was Pinned), the Americans were able to use theirs. The American Infantry Unit that had previously assaulted the German Infantry Unit in the farm chose not to move and fired at them …

… and inflicted a further 3 casualties.

The German Infantry Unit then failed its Morale Check and fell back, leaving the farm unoccupied.

Turn 5
The situation on the tabletop had now reached a stage where both sides were roughly equal. They had both had an Infantry Unit fall back, and both still had intact Veterans and Officers. The Americans had suffered a few more casualties than the Germans, but not sufficient to restrict their ability to achieve their objective.
The Germans drew a ‘1 Vehicle Unit may Move once, and then 1 Infantry Unit may Move once then Fire once’ Command Card and the Americans drew a ‘Fire with 1 Infantry Unit. Then 1 different Infantry Unit may Fire and then Move’ Command Card.
As the Germans had no Vehicle Units, they moved their Veteran Unit so that it could fire at the remaining American Infantry Unit.

The effect was devastating, and the American Unit’s sole survivor began to retreat towards his side’s Deployment Zone.

At this point the Germans had achieved their objective and thus won the battle.
Comments
- During the set-up stage I did have a few problems trying to work out which figures were which as the images on the counters are quite small. I really wish that I had bought a box each of Airfix’s WW2 German and WW2 US troops before mounting the play-test as I would have had no problems identifying which figures were armed with which weapons. (In fact, it doesn’t really matter what is depicted on each counter as this is not important as far as resolving combat is concerned … but for aesthetic reasons I think I prefer to be able to identify the weapons each figure is armed with.)
- I really like the Assault Rules! The fact that the defenders can lay down defensive fire before the Assault takes place at least gives them a chance to stopping it in its tracks. In addition, the ability of defending Units to counter-assault makes the outcome for both sides uncertain until the whole process is finished.
- Infantry casualty rates seem to be quite high … but I suppose that they might have been lower in this play-test if I had used the available cover somewhat better and not mounted an assault on such a heavily garrisoned farm.
- It was fun to play, even though my method of playing solo might have left something to be desired. The play-test did enable me to use most of the main game mechanisms, which worked extremely well and were quite simple once they had been mastered.
This was my first play-test of the AIRFIX BATTLES rules, and I hope to mount further battles in the near future so that I can see how well they work when Armoured Vehicle and Artillery Units are involved as well.
Airfix Battles: Inside the box!
Posted: April 30, 2016 Filed under: Airfix Battles, Early 20th Century, Wargame Design 26 CommentsThe whole thing comes in a sturdy cardboard box, and the box lid looks like this:

The bottom of the box has a description of the contents as well as a number of illustrations of the various components.

When the box lid is taken off, the contents of the box look like this:

The game comes with 54 Force cards (top left), 54 Command cards (top right), and a bag of ten D6 dice,

The rule book is 24 pages long …

… and the scenario (or ‘Mission’) book covers 10 scenarios/missions within its 12 pages.

There are two A2-sized double-sided maps/battlefields depicting a ‘Crossroad’, …

… a ‘Checkpoint’, …

… a ‘Long Road’ …

… and a ‘Forest’.

Each is divided up into a 7 x 5 grid of 8.5cm squares.
The three sets of double-sided cardboard counters are quite substantial, and give an interesting mix of figures, vehicles, equipment, and terrain.
Set One (Front)

Set One (Back)

Set Two (Front)

Set Two (Back)

Set Three (Front)

Set Three (Back)

Inside this game is everything that you need to fight a battle, and I can foresee wargamers having this to hand as a great ‘stand by’ for those occasions when they do not have the time, the space, or the inclination to set up figure game. It is also a great way to introduce people (both young and old) to wargaming, and the fact that it is designed so that the counters can easily be replaced by figures and model vehicles makes it even more flexible.
The team at Modiphius (Nick Fallon, Alan Paull, and Chris Birch) and Airfix (i.e. Hornby Hobbies Ltd.) have come up with what I think is a winning combination … and I look forward to future expansion sets being developed and becoming available.
Some interesting things were delivered whilst we were away
Posted: April 28, 2016 Filed under: Airfix Battles, Book Review, Colonial, COW (Conference of Wargamers), Early 19th Century, Early 20th Century, Late 19th Century, Wargame Design 8 CommentsThe book was one of Osprey’s latest publications, IMPERIAL CHINESE ARMIES 1840-1911.

It was written by Philip S Jowett and illustrated by Gerry Embleton and is No.505 in the ‘Men-at-Arms’ series (ISBN 978 1 4728 1427 2). It is divided into a number of chapters with the following titles:
- Introduction
- Conflicts with external enemies
- The Armies
- Character of the Imperial Army
- Weapons
- Uniforms & Equipment
This book fills a niche in my collection and will hopefully spur me to sorting out the small collection of Chinese figures that i have in my collection of 15mm-scale wargames figures.
The game was AIRFIX BATTLES by Modiphius.

I bought this game for a number of reasons, including:
- Nostalgia: Like so many wargamers of my generation, my first ‘proper’ wargames were fought using Airfix figures and tanks, and buying this game seemed to be the obvious thing to do.
- Interest in the period: I grew up with stories about the Second World War, and it has always been one of my wargaming areas of interest. For this reason I seem – over the years – to have collected quite a few sets of rules etc. and if for no other reason than that, I wanted a copy of this game.
- Interesting design features: I have met one of the designers at COW (Wargame Development‘s annual Conference of Wargamers) and he has promised to demonstrate the game at this year’s conference. As I know that he designs games with interesting features and mechanisms, it struck me that having a look at the game before the conference might be a good idea.
I have yet to take the components out of the box and to use them … but rest assured that when I do, I will write a blog entry about my play-test.
