Table Top Battles – Some further thoughts on adapting the rules for mid-20th century warfare
Posted: December 31, 2008 Filed under: Table Top Battles, World War II Leave a commentI intend to allocate Stand Points Values as follows:
- 1 point: Poor General and Militia Infantry
- 2 points: Average General, Light Armoured Fighting Vehicles, Conscript Infantry, and Artillery
- 3 points: Exceptional General, Medium Armoured Fighting Vehicles, Cavalry, and Regular Infantry
- 4 points: Heavy Armoured Fighting Vehicles and Elite Infantry
I intend to use the following weapon ranges:
- Infantry Weapons: 2 hexes
- Armoured Fighting Vehicle Weapons and Anti-tank Artillery: 4 hexes
- Artillery: 6 hexes
With any luck I should be able to try these ideas out in a play-test tomorrow.
After adding this entry to my blog I realised that it was actually the 50th entry I have made since I started … and I managed to add it on the last day of 2008!
Hexon II – Just how much do I own?
Posted: December 30, 2008 Filed under: Table Top Battles Leave a commentBecause I am beginning to recover from the virus I have had over Christmas I thought that it would be a good time to sit down and take stock of what Hexon II terrain I own. It also gave me the opportunity to sort it into the IKEA storage boxes I bought some time ago to store it in. I expected that the whole exercise would take me an hour or so … and now – some four hours later – I have a complete list of every bit of Hexon II terrain that I own and it is safely stored in its own fully labelled storage boxes.
What surprised me was the sheer amount that I own. Besides enough basic terrain tiles to cover an area 15’ x 4’ (a box will cover 3’ x 4’ and I have a box each of the Green, Green/Brown, Desert, Desert Transitional, and Blue terrain tiles) I have 19 mountains and rocky outcrops, 28 hills and escarpments, and several feet of streams, rivers, and roads. I also have a trench system and a variety of fortifications.
This stocktaking exercise has convinced me that I must concentrate on developing the TABLE TOP BATTLES wargames rules so that I can use them with my Hexon II terrain.
Christmas is over … but the virus remains!
Posted: December 28, 2008 Filed under: Wargames publications 2 CommentsUnfortunately my wife and I also succumbed to the virus that is currently laying so many people low in the UK, and this is lingering on now that we have returned home. One effect of this virus is a total lack of physical and mental energy. I just cannot concentrate on anything. This is a great pity as my wife bought me the latest publication by FOUNDRY PUBLICATIONS and I was looking forward to reading it.
The book is ARMIES OF THE 19th CENTURY: THE AMERICAS 1: THE PARAGUAYAN WAR by Terry Hooker. It contains background information about the war, a detailed history of the war, and extensive information about the armies and uniforms of the protagonists. I am sure that it will give me lots of ideas for new wargame armies to collect and battles to fight.
Table Top Battles – Some thoughts on adapting the rules for mid-20th century warfare
Posted: December 23, 2008 Filed under: Table Top Battles, World War II Leave a commentThe rules as published do have a section dedicated to minor changes so that science fiction wargames can be fought, and these include data and rules for armoured vehicles. These have helped me to formulate my ideas.
One thing that is not covered is the use of transport to carry infantry into battle or to tow artillery. I have therefore come up with the following rules that I hope will cover this:
- With the exception of Transport stands that are carrying or towing another stand, only one stand is allowed to occupy a square even if there is room for additional stands to be placed in the square.
- Motorised Transport and Armoured Fighting Vehicle stands may carry a General or an Infantry stand, but the stand that is being carried may not fire or take part in Hand-to-Hand combat during any turn that it is being carried. When the carried stand dismounts it must dismount into a vacant square to the side or rear of the stand that has carried it. Likewise, when a General or an Infantry stand mounts a Motorised Transport or Armoured Fighting Vehicle stand it may only mount from a square to the side or rear of the stand that will carry it.
- Horse-drawn and Motorised Transport stands may tow an Artillery Stand, but the stand that is being towed may not fire or take part in Hand-to-Hand combat during any turn that it is being towed. When the towed stand is unlimbered it must unlimbered into a vacant square to the rear of the stand that has towed it. Likewise, when an Artillery stand is limbered to a Transport stand it may only be limbered from a square to the rear of the stand that will tow it.
Once the Christmas break is past I hope to have the opportunity to try these rules out in with a play-test.
The Battle of Tebourba
Posted: December 22, 2008 Filed under: Battle Report, World War II 3 CommentsThe original battle took place in Tunisia from 29th November to 4th December 1942 when the Germans mounted an attack on British and American forces in and around the area. After fierce fighting the Germans finally took the town on 4th December.
The game went well and produced a reasonably realistic result. The Germans were beginning to prevail as the game came to an end, but the British and Americans had acquitted themselves quite well. My own role – commander of the American armour – resulted in a ‘death ride’ by a battalion of Stuart tanks against a large number of Panzer IIIs. My battalion was wiped out, but did manage to hold the German advance up for several vital moves.
I don’t have any images of the actual game – I was far too engrossed to think about using my camera – but I did take some pre-game pictures that show the basic terrain and some of the Allied forces in place.
Terrain
The terrain used was created using HEXON II. The green areas were areas of cultivation in which troops had restricted visibility.


The image above shows the British and American artillery astride the main supply route for the forces in and around Tebourba.

The image above shows a battalion of American Stuart tanks, supported by a company of Shermans. The Stuarts were destroyed holding up the main German armoured thrust and all but one of the Shermans shared their fate.


The two images above show the centre of the Allied defences.


The two images above show two of the three British infantry battalions deployed around Tebourba in defensive positions.
Table Top Battles – Play-test – Land Battles (on hexes)
Posted: December 20, 2008 Filed under: Battle Report, Table Top Battles 2 CommentsIn the following play-test I decided to use the same scenario as I used for my first play-test of the rules, and I recreated the terrain using HEROSCAPE hexes. The resulting tabletop was a bit thinner than the squared grid version, but otherwise it was basically the same.
I then placed the figures in the same starting positions.

The following report on the play-test is not as detailed as the previous one as I saw no need to repeat an explanation of the rules mechanisms used.
Turn 1
The Mahdists had the initiative during this turn.
The Mahdists chose not to move, and the Egyptian Lancers units charged towards the line of Hadendowa Infantry units that was between the Egyptian column and its objective. The rest of the Egyptian force followed at a more sedate pace.

Turn 2
The Egyptians had the initiative during this turn.
The Egyptian Lancer units hit the right-hand end of the line of Hadendowa Infantry units. The Egyptian Artillery unit moved forward and deployed to the left of the Egyptian column so that it could fire at the left-hand end of the line of Hadendowa Infantry units. The rest of the Egyptian column continued its advance towards it objective.
The Hadendowa Infantry units chose not to attempt to avoid Hand-to-Hand combat with the Egyptian Lancers. The rest of the Mahdist force did not move and remained hidden from view from the Egyptians.

The Hand-to-Hand combat between the Egyptian Lancers and the Hadendowa Infantry was fierce, and resulted in the destruction of the right-hand front unit of Hadendowa Infantry. However, everything did not go well for the Egyptians and their left-hand unit of Lancers was forced to withdraw.

Turn 3
The Mahdists had initiative during this turn.
Seeing one of the Egyptian Lancer units fall back, the Hadendowa Infantry swarmed forward. The Mahdist Cavalry units moved towards the bottom end of the hill they were behind and the Jihadia Infantry units moved onto the hill they had been hiding behind.
The Egyptian Lancer units attempted to avoid further Hand-to-Hand combat, but failed. The rest of the Egyptian force advanced and shook itself into line to meet and engage the Hadendowa Infantry units.

The leading Jihadia Infantry unit opened fire on the Egyptian Artillery unit … and wiped it out. The leading Egyptian Infantry units engaged the foremost Hadendowa Infantry units, and forced one of the to withdraw.
The Hand-to-Hand fighting between the Egyptian Lancer units and the right-hand Hadendowa Infantry units resulted in the destruction of one of the Hadendowa Infantry units. One of the Egyptian Lancer units was, however, forced to withdraw.

Turn 4
The Mahdists had initiative during this turn.
Seeing that there was an opportunity to destroy the Egyptian column, the Hadendowa Infantry units surged forward. The Mahdist Cavalry units swept around the bottom end of the hill they had been behind – thus threatening the rear of the Egyptian force – and the Jihadia Infantry units began lining the hill they were on with the intention of firing down on to the Egyptians.
The Egyptian Lancer units again failed to avoid Hand-to-Hand combat with the Hadendowa Infantry. The rest of the Egyptian column tried to form itself into a defensive formation to meet the threats posed by the Jihadia Infantry and Mahdist cavalry units.

Both sides opened fire on each other, but luck was against the Egyptians. Rifle fire from the Jihadia Infantry units cut down two of the Egyptian Infantry units before they could inflict any casualties on their Mahdist opponents. At the same time, the Egyptian Infantry unit that was engaging the advancing Mahdist cavalry failed to stop them.
The Hand-to-Hand combat also went badly for the Egyptians, and one of the Lancer units was wiped out.

Turn 5
The Egyptians had initiative during this turn.
A sensible commander facing a conventional opponent would – at this stage of the battle – have capitulated. However, the Egyptian General knew that he and his men would receive no mercy at the hands of the Mahdists. He therefore attempted to break of action and retreat.
The Mahdists, seeing their enemy falling back, fell on them with a vengeance.

The Egyptians fired a volley at the Mahdists, but caused no casualties. The Jihadia were, however, much more effective and killed both the General and one of the Egyptian Infantry units. The rest of the fighting was then down to bayonet against spear, and the resulting Hand-to-Hand combat saw the Egyptians wiped out.
Conclusions
It is very easy to use hexes in place of squares, but …
… although the terrain looks fine (it could do with being repainted so as to ‘lose’ the brown edging to each hex) the ‘look’ of the battle is somehow not quite right. I suspect it is the fact that colonial armies tended to fight in very linear formations (lines and squares) and that these cannot be created easily on a hexes. The less formal formations used by many native armies probably look no better or no worse on hexes than they do on a squares, but somehow this battle did not quite look right.
I have therefore come to the conclusion that for battles from the pre-20th century period fought using the TABLE TOP BATTLES wargames rules, squares are superior. However the more fluid formations used by armies during the mid to late 20th century should look all right on hexes. My next play-test will, therefore, be an attempt to see if the rules can be used for 20th century battles.
Table Top Battles – Jigwar terrain boards
Posted: December 18, 2008 Filed under: Table Top Battles 2 CommentsThe product had sold quite well when it was introduced but due to technical problems with the manufacturing process it was withdrawn some years ago. Unfortunately I was too late to buy the remaining stock of terrain boards – they sold the last stock three months ago.
I have a few unpainted and unmarked Jigwar terrain boards left, but a few spares would have been nice.
C’est la vie!
Comments
Posted: December 17, 2008 Filed under: MIscellaneous musings 2 CommentsI have done this because it is the only way I can find to make sure that I don’t miss a comment made by a visitor. It also means that I can ensure that I reply to comments that visitors have taken time and effort to make.
Joseph Morschauser – Images of some of his games
Posted: December 16, 2008 Filed under: Early Wargames and Wargamers, Joseph Morschauser, Wargames publications Leave a comment
The original caption reads as follows: Will the fort fall? The war gamers who fought this battle used 54mm figures mounted on 4″ trays with various numbers of figures on each tray. In the foreground is the “Great Wall of Morobad” plaster cast.

The original caption reads as follows: A thin red line of British soldiers prepares to meet the assault. The figures include Somerset Light Infantrymen and cannon made by Britains in 54mm.
The following three images of wargames played by Joseph Morschauser on a gridded tabletop are from Donald Featherstone’s ADVANCED WAR GAMES.


The original caption for these photos reads as follows: Gridded war-games tables – set out by American war-gamer Joseph Morschauser.
Joseph Morschauser – An early pioneer
Posted: December 16, 2008 Filed under: Early Wargames and Wargamers, Joseph Morschauser, Wargames publications 8 Comments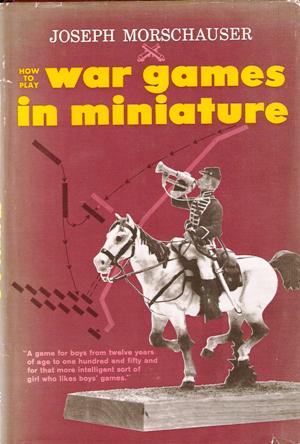
The book was published in the same year as Donald Featherstone’s WAR GAMES. It contains three sets of rules (for what he terms the Shock Period, the Musket Period, and the Modern Period) and proposes the use of multi-figure bases to make up units (something Donald Featherstone’s book did not) and the use of what Morschauser calls ‘The Roster System’. The latter was a means of recording casualties on units without removing the a base until a certain number of ‘hits’ had been inflicted on the unit.
Now none of this sounds new to wargamers now, but at the time this was very revolutionary stuff. This was certainly the first time that I had ever seen in print the idea of multi-figure bases making up units and individual figures not being removed after a ‘hit’ had been inflicted.
It is also interesting how your memory can play tricks on you. I remember photos of Morschauser’s games showing a gridded playing surface, and therefore thought that the rules featured in his book used a grid. On re-reading the rules, I discovered that I was wrong. They do not use a grid; they use pre-cut measuring sticks and bits of string (the latter for movement that is not in a straight line). That said, two of the photos in the book show 54mm figures – mounted on multi-figure bases – on a gridded tabletop.
